
Planning a birthday party for your little one and considering a Minnie Mouse theme? You’re in the right place! Minnie Mouse birthday cakes are not only adorable but also a perfect centerpiece for any party. Whether you’re looking for a classic design or a unique twist, there are countless ways to incorporate Minnie Mouse into your cake that will wow your guests. Read on for ideas, tips, and inspiration to make the most of this iconic character at your next celebration.

Table of Contents
Why Choose a Minnie Mouse Cake for Your Birthday?
When it comes to celebrating a special occasion, few things are as memorable as a well-designed birthday cake. Minnie Mouse birthday cakes are a fantastic choice for several reasons:
- Timeless Appeal: Minnie Mouse is a beloved character for both kids and adults, making it an ideal choice for any birthday party.
- Versatility: Whether your child loves the traditional red, yellow, and black color scheme or prefers a more personalized approach, Minnie Mouse can fit any theme.
- Delicious and Fun: Not only are these cakes visually appealing, but they can also be made in a variety of delicious flavors that everyone will enjoy.
Choosing a Minnie Mouse cake ensures your birthday celebration stands out and provides an unforgettable experience for all the guests.
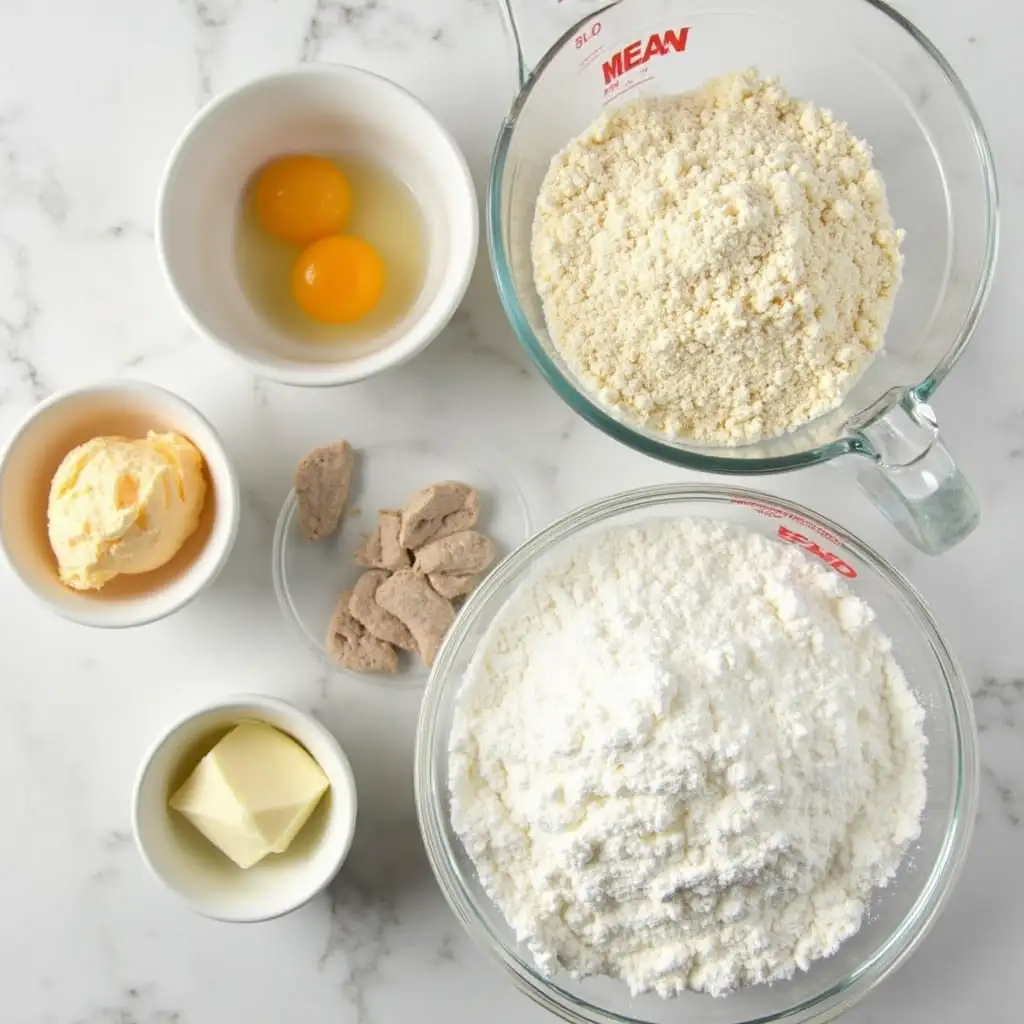
Ingredients for a Minnie Mouse Cake
To bake a simple yet delicious Minnie Mouse birthday cake, you will need:
Cake Base:
- 2 1/2 cups all-purpose flour
- 2 1/2 tsp baking powder
- 1/2 tsp salt
- 1 cup unsalted butter (softened)
- 2 cups granulated sugar
- 4 large eggs
- 1 tbsp vanilla extract
- 1 cup whole milk
- Red and black food coloring (for decorations)
Buttercream Frosting:
- 1 cup unsalted butter (softened)
- 3 cups powdered sugar
- 2 tbsp heavy cream
- 1 tsp vanilla extract
- Black, red, and white food coloring
Step-by-Step Guide to Decorating Your Minnie Mouse Cake
- Bake Your Cake: Preheat your oven to 175°C (350°F). Grease two round cake pans and one smaller round pan for Minnie’s ears. Mix the dry ingredients and set aside. Cream the butter and sugar, then add eggs one by one. Alternate adding flour mixture and milk, then mix in vanilla extract.
- Prepare Your Frosting: Beat butter until creamy. Slowly add powdered sugar, then heavy cream and vanilla extract. Mix until smooth.
- Assemble the Cake: Place the large cake in the center with two smaller cakes positioned as Minnie’s ears.
- Decorate with Fondant or Frosting: Use black frosting for the face, red for Minnie’s bow, and white polka dots for added detail.
Tools and Materials You’ll Need for the Perfect Cake
To create the perfect Minnie Mouse birthday cake, you’ll need the following:
- Round cake pans
- Fondant in black, red, and white
- Buttercream frosting for smoothing
- Food coloring (optional, if you prefer colored frosting)
- Tools like a rolling pin, cake decorating tips, and a smooth scraper
Best Minnie Mouse Cake Flavors to Try
Classic Flavors for a Minnie Mouse Cake
- Vanilla Cake: A light and fluffy option that pairs well with almost any frosting.
- Chocolate Cake: Rich and decadent, it’s a favorite among kids and adults alike.
- Strawberry Cake: Offers a fruity twist to the classic design, complementing the sweetness of the frosting.
Fun and Creative Flavor Combinations for a Minnie Mouse Cake
- Red Velvet and Cream Cheese Frosting: This combination adds a touch of elegance and a fun color contrast for a Minnie Mouse theme.
- Lemon and Buttercream: The tartness of lemon can balance out the sweetness of the frosting for a unique flavor profile.

Popular Minnie Mouse Cake Designs and Themes
When it comes to Minnie Mouse birthday cakes, there are endless design possibilities. Below are some popular themes that are sure to delight guests of all ages.
Classic Minnie Mouse Cake Designs
One of the most popular choices is the traditional Minnie Mouse cake design. These cakes typically feature:
- A large round face of Minnie Mouse in black fondant.
- Red bow accents, often made from fondant or edible decorations.
- Simple, colorful details that reflect Minnie’s iconic look.
These designs are perfect for keeping things sweet and classic. They serve as the focal point of any party, evoking nostalgia and charm.
Unique Minnie Mouse Cake Variations
For those looking to get creative, there are unique variations of the Minnie Mouse cake that go beyond the traditional designs. Here are a few ideas:
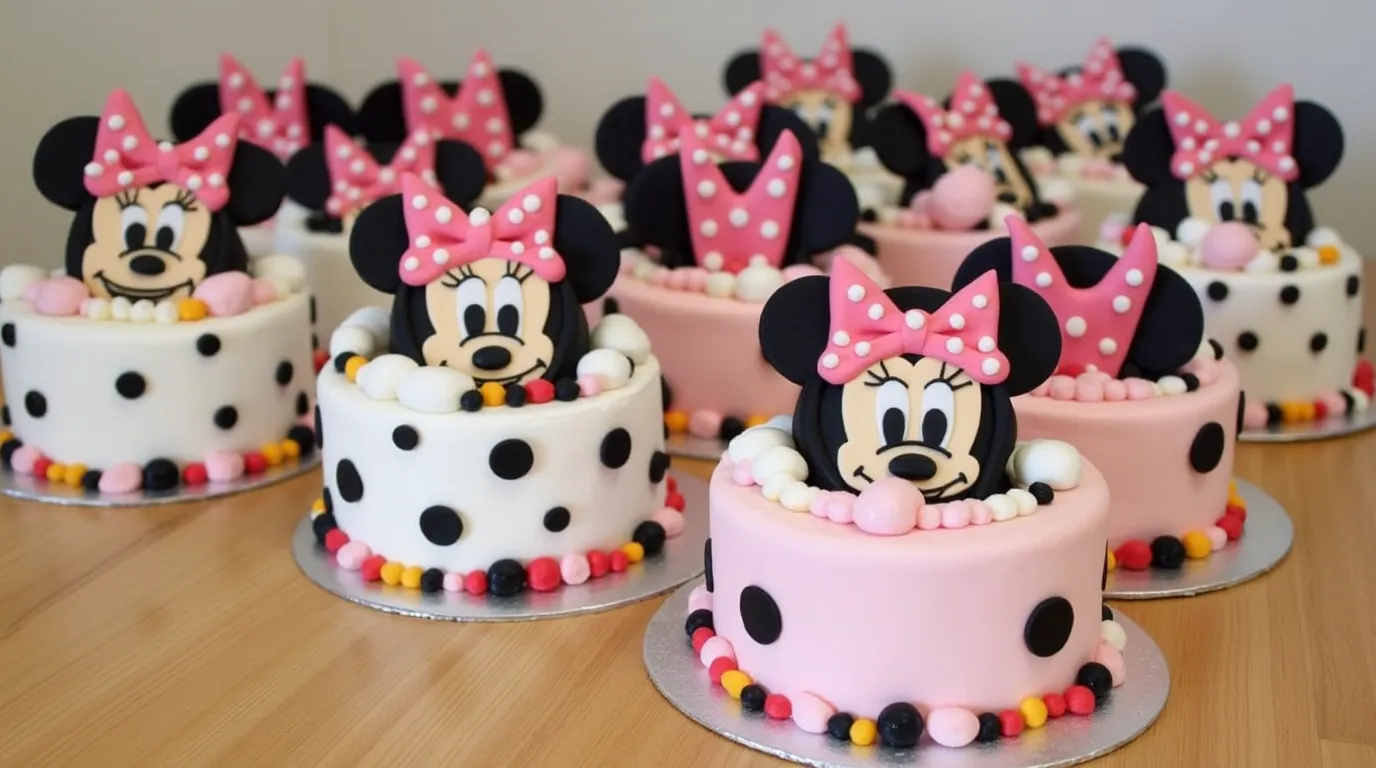
- Minnie’s Polka Dots: Incorporate fun polka dot patterns on the cake and accessories, making it look playful and vibrant.
- Minnie Mouse with Friends: Add other Disney characters alongside Minnie, such as Mickey, Daisy, and Goofy, for a more interactive theme.
3D Minnie Mouse Cake Designs
For a truly impressive look, a 3D Minnie Mouse birthday cake will leave everyone in awe. These cakes can be designed to stand upright, with Minnie’s head or full body sculpted out of cake and covered with fondant.
This type of design requires a little more skill but is definitely worth the effort. The 3D Minnie Mouse cake can be the centerpiece of your party, capturing the attention of all guests.
Minnie Mouse Cupcakes: The Perfect Mini Treat
If you want to serve up individual servings, Minnie Mouse cupcakes are a fantastic option. You can decorate these cupcakes with Minnie’s ears, red bows, and polka dots for that signature Minnie look. These treats are perfect for kids and easy to serve at a party.
How to Make a Minnie Mouse Birthday Cake at Home
Making your own Minnie Mouse birthday cake can be a fun and rewarding experience. With a bit of preparation and the right materials, you can create a masterpiece that will impress your guests. Here’s how to do it:
Step-by-Step Guide to Decorating Your Minnie Mouse Cake
- Bake Your Cake: Start by baking your favorite cake flavor. You can use a round pan for a classic Minnie Mouse face or a more intricate shape for a full-body design.
- Prepare Your Frosting: You’ll need black, red, and white buttercream frosting to achieve the classic Minnie look. Alternatively, fondant can be used for a smoother finish.
- Assemble the Cake: Layer the cakes and apply frosting between each layer. Once the cake is assembled, use black frosting to form Minnie’s face and red for the bow.
- Add Details: Use small fondant pieces to add the bow and the ears, ensuring they stay in place.
Tools and Materials You’ll Need for the Perfect Cake
To create the perfect Minnie Mouse birthday cake, you’ll need the following:
- Round cake pans
- Fondant in black, red, and white
- Buttercream frosting for smoothing
- Food coloring (optional, if you prefer colored frosting)
- Tools like a rolling pin, cake decorating tips, and a smooth scraper
These materials will help you bring your vision of Minnie Mouse to life, ensuring a professional-looking result.
Best Minnie Mouse Cake Flavors to Try
Choosing the right flavor for your Minnie Mouse birthday cake is just as important as the design. There are classic and creative flavor options that can suit anyone’s taste.
Classic Flavors for a Minnie Mouse Cake
- Vanilla Cake: A light and fluffy option that pairs well with almost any frosting.
- Chocolate Cake: Rich and decadent, it’s a favorite among kids and adults alike.
- Strawberry Cake: Offers a fruity twist to the classic design, complementing the sweetness of the frosting.
Fun and Creative Flavor Combinations for a Minnie Mouse Cake
- Red Velvet and Cream Cheese Frosting: This combination adds a touch of elegance and a fun color contrast for a Minnie Mouse theme.
- Lemon and Buttercream: The tartness of lemon can balance out the sweetness of the frosting for a unique flavor profile.
Customizing Your Minnie Mouse Cake with Personal Touches
Personalizing your Minnie Mouse birthday cake is a great way to add extra charm and make it special for the birthday person.
Minnie Mouse Cake Toppers: From DIY to Professional
You can add various Minnie Mouse cake toppers to enhance the design:
- DIY Toppers: Create your own toppers with fondant or edible print-outs of Minnie Mouse.
- Professional Toppers: Buy ready-made toppers from stores that feature Minnie Mouse, such as her iconic ears and bow.
These toppers can add an extra layer of detail to your cake, making it look even more impressive.
Adding Personal Details for Extra Charm
Incorporate the birthday child’s name or age into the design with edible lettering or fondant cutouts. Adding personal touches can make the cake feel even more special.
How to Incorporate Minnie Mouse Into Your Party Theme
Your Minnie Mouse birthday cake can be a central part of a larger Minnie Mouse-themed party. Here are some ways to integrate Minnie Mouse into your entire event:
Minnie Mouse-Themed Party Decorations
- Balloons: Use Minnie Mouse-shaped balloons or red, yellow, and black color schemes for decor.
- Table Settings: Set the table with Minnie-themed plates, napkins, and cups.
- Party Favors: Give guests Minnie Mouse party favors, such as stickers, toys, or themed bags.
Minnie Mouse Birthday Party Favors
You can also create Minnie Mouse-themed party favors to send home with guests. These could include:
- Personalized Minnie Mouse bags
- Minnie Mouse toys and accessories
- Themed cookie bags shaped like Minnie’s face

Trending Minnie Mouse Cake Ideas for 2025
In 2025, new techniques and trends are emerging for Minnie Mouse birthday cakes. Keep up with these modern trends to create a cake that stands out.
Modern Minnie Mouse Cake Trends
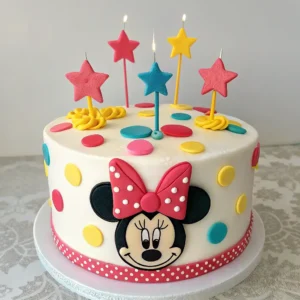
- Minimalist Designs: Less is more with simple, clean lines and a few bold accents like a red bow.
- Pastel Colors: Light pinks, yellows, and lavender are becoming more popular for a softer, more modern look.
Incorporating New Techniques in Minnie Mouse Cake Design
New trends in cake decoration, such as edible ink printing or intricate piping, will allow you to take your Minnie Mouse birthday cake to the next level. Experiment with these techniques for a fresh twist on the classic Minnie design.
Frequently Asked Questions (FAQs)
How Do I Make a Minnie Mouse Cake Without Fondant?
You can use buttercream frosting instead of fondant. Pipe black frosting for Minnie’s ears and red frosting for the bow. Use chocolate discs for ears and candies for details
Can I Make a Minnie Mouse Cake Without Special Equipment?
Yes! Use simple round cake pans and basic decorating tools. A plastic bag with a cut corner can replace a piping bag.
How Can I Make a Minnie Mouse Cake for a Large Group?
Bake a two-tier cake or multiple sheet cakes decorated in Minnie Mouse style. Cupcakes can also be a great addition.
How Long Does It Take to Make a Minnie Mouse Cake?
It depends on the design, but a simple cake takes about 3-4 hours, including baking and decorating.
Conclusion
With the right design, flavors, and decorations, your Minnie Mouse birthday cake can be the highlight of your party. Whether you choose a classic or modern look, adding personal touches will make it truly special. Happy baking!
Minnie Mouse Birthday Cakes
Ingredients
- 2 ½ cups all-purpose flour
- 1 ½ teaspoons baking powder
- ½ teaspoon baking soda
- ¼ teaspoon salt
- 1 cup unsalted butter softened
- 1 ½ cups granulated sugar
- 4 large eggs
- 2 teaspoons vanilla extract
- 1 cup buttermilk
- Pink and white fondant
- Black fondant
- Buttercream icing colored pink
- Mini chocolate chips or black edible decorations for Minnie’s ears
Instructions
- Recipe Instructions:
- Preheat your oven to 350°F (175°C). Grease and flour two 9-inch round cake pans.
- In a medium bowl, mix the flour, baking powder, baking soda, and salt. Set aside.
- In a large bowl, cream together the butter and sugar until light and fluffy. Add the eggs, one at a time, beating well after each addition. Stir in vanilla extract.
- Alternately add the dry ingredients and buttermilk, mixing just until combined. Do not overmix.
- Divide the batter evenly between the prepared pans. Smooth the top of the batter with a spatula.
- Bake in the preheated oven for about 30-35 minutes or until a toothpick inserted into the center comes out clean.
- Let the cakes cool in the pans for 10 minutes, then transfer to wire racks to cool completely.
- Once cooled, trim the tops of the cakes to level them. Stack the cakes, using a thin layer of buttercream between them.
- Roll out the pink and black fondant and cover the cake, smoothing it out to eliminate air bubbles.
- Create Minnie Mouse’s ears by cutting out circles from black fondant and attaching them to the cake using buttercream.
- Use pink fondant to create a bow and place it on top of the cake.
- Decorate with additional edible decorations or chocolate chips to create Minnie’s signature look.
- Serve and enjoy the delightful Minnie Mouse birthday cake!
Notes
Recipe Notes:
- Fondant Tips: If you’re new to working with fondant, roll it out on a lightly powdered surface to prevent sticking. You can also use a little cornstarch or powdered sugar to help with this.
- Cake Moisture: If the cake feels too dry, try adding a little extra buttermilk or substitute some of the buttermilk with sour cream for an extra moist texture.
- Decoration Variations: You can customize Minnie Mouse’s bow with different colors to match your party theme. Red or yellow fondant can be used for a fun twist.
- Serving Suggestions: This cake is perfect for birthday parties, especially for young kids or Disney fans. Pair it with fun themed plates and napkins for extra flair.
- Storage: Store any leftover cake in an airtight container at room temperature for up to 3 days, or refrigerate it for up to a week. The cake can also be frozen for longer storage.
- Allergy Considerations: If anyone has an egg or dairy allergy, look for suitable substitutes for eggs (like flax or chia eggs) and non-dairy butter or milk.
4 thoughts on “MAGICAL MINNIE MOUSE BIRTHDAY CAKES TO WOW YOUR GUESTS!”